

Table of Contents
1. Introduction to inflatable tents
2. Key features and evaluation criteria for inflatable tents
3. Setup speed and stability best practices
4. inflatable tent FAQ
5. Conclusion and practical takeaways
Introduction to inflatable tents
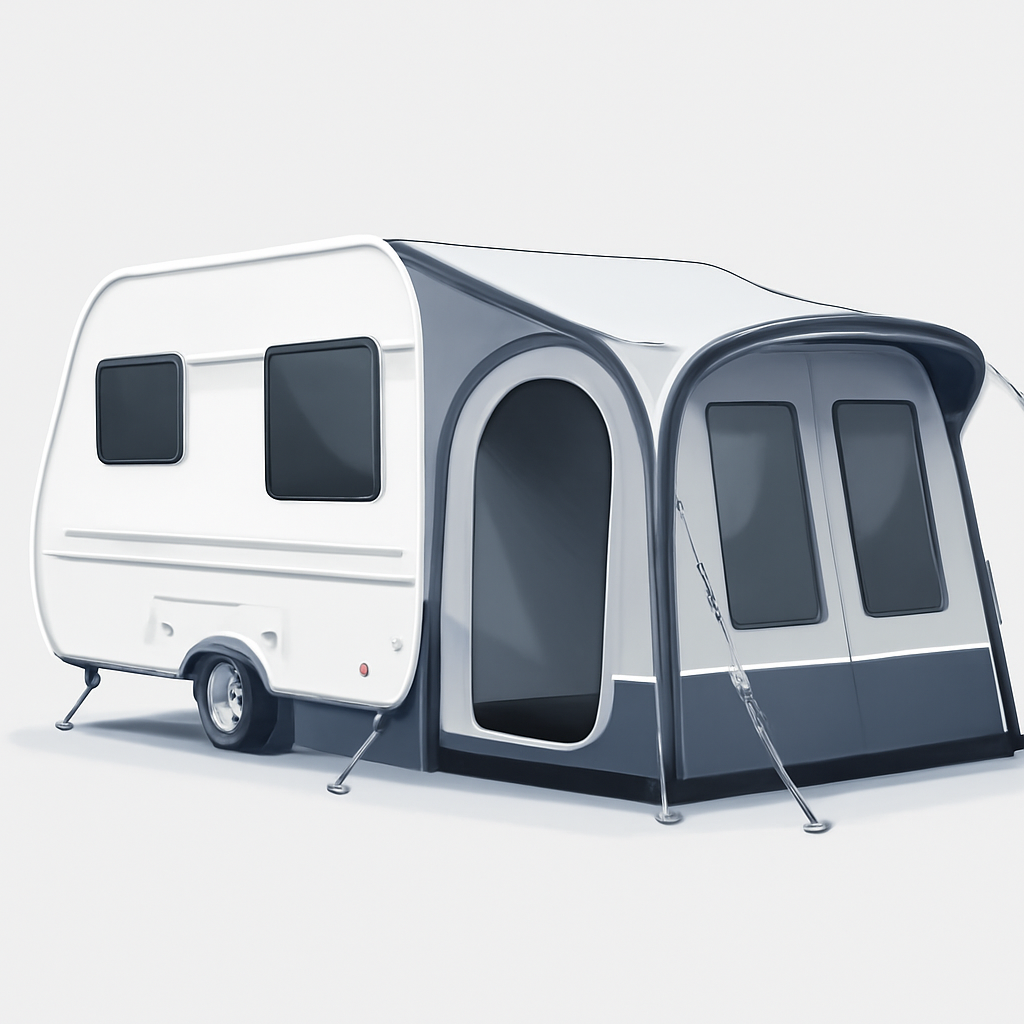
inflatable tents, also called air tents or airbeam tents, replace traditional poles with inflated beams to form the shelter’s frame. This approach yields a roomier interior, fewer parts to assemble, and a cleaner campsite footprint. Most models include built-in or rapid-connect pumps, so you can go from bag to shelter in minutes. Waterproof inflatable tent options with built-in air pumps handle unpredictable weather, while lightweight options suit backpacking. For families, the best inflatable tent for family camping balances space with speed, while affordable inflatables deliver easy setup for budget trips and a stable, durable shelter in wind and rain. This context sets the stage for evaluating the key features and criteria that separate top inflatable tents.
What is an inflatable tent and how it works
Airbeam design and pump integration
Airbeam tent design relies on inflatable beams replacing poles. Chambers inflate via a built-in pump or rapid-connect inflator, often with a single valve for multiple beams. When inflated, these beams stiffen the shelter, improving wind resistance and reducing the risk of pole failure. A tight canopy and well-sealed vestibules help keep rain out and space in.
Why inflatable tents matter for speed, stability, and packability
Practical impact
Speed: inflation shortens setup time versus traditional pole tents, letting you claim a site quickly. Stability: air-beam geometry resists gusts and reduces stake load, even on breezy sites. Packability: deflated beams compress into compact bundles, fitting more easily into backpacks or car trunks.
Key features and evaluation criteria for inflatable tents
Inflatable tents fuse air-beam structures with integrated pumping systems to deliver quick, reliable setups and spacious interiors. When evaluating an inflatable tent, focus on how the core design choices translate to real-world performance: faster setup, fewer pinch points, and lasting weather protection. The following criteria help compare air tents, inflatable camping tents, and other inflatable shelters across family trips, backpacking loops, or casual weekend outings.
Core components: air beams, valves, and fly systems
Air beams and interior space
Air beams replace rigid poles, unlocking generous headroom and a more open floor plan. The absence of pole pins reduces pinch points at corners, making it easier for families to move around and for cots or air mattresses to fit. Look for models marketed as airbeam tents with a tall center height and a near-rectangle footprint for sleeping suites and gear storage. In practice, a well-designed airbeam layout can add 10–20% usable interior space compared with a comparable pole-supported tent, which matters for the best inflatable tent for family camping.
Valves and inflation control
Quality valves ensure repeatable inflation without leaks. Dual-stage or multi-point inflation systems let you adjust pressure in layers, while one-way valves prevent air backflow during setup. Integrated hand or foot pumps speed readiness, and some models support a built-in air pump for “set it and forget it” inflation. For those chasing quick setup, look for a model that inflates to firm efficiency in under 5–7 minutes with minimal effort.
Fly systems and weather protection
The fly system seals out rain and wind while contributing to overall stability. A well-tuned rainfly provides an outer layer of waterproofing and reduces interior condensation by directing airflow around the canopy. Inflatable shelters with robust fly systems tend to hold up better in gusts, maintaining a steady footprint and sleep comfort. Check that the fly attaches securely to the beams and that guy-out points are reinforced for high-wind scenarios.
Durability and weather sealing: waterproofing and seam quality
Waterproofing ratings and floor coatings
Waterproof ratings indicate how much rain a tent can handle before leaking. Look for fabrics with a 1500–3000 mm hydrostatic head as a baseline for casual camping, and 3000–5000 mm for wetter climates. A waterproof floor coating—often polyurethane or a PVC-nylon blend—prevents ground moisture from seeping in. Pay attention to the bathtub-floor design and whether the floor is fully sealed to reduce water migration during downpours.
Seam taping and fabric integrity
Seam taping is the frontline defense against leaks. Fully taped seams on every panel and the fly line where fabric meets zippers minimize water ingress. DWR (durable water repellent) coatings on fabric surfaces help droplets bead and roll off, reducing saturation during light rain. For extended exposure, verify that critical seams—doors, windows, and floor—receive extra taping.
Zippers, guy lines, and fabric UV resistance
Heavy-duty, corrosion-resistant zippers endure repeated zipping and unzipping without snagging. Reinforced guy lines with reflective strands improve nighttime visibility and stability on windy campsites. Fabric UV resistance prolongs color fastness and structural integrity after multiple seasons of sun exposure. Together, these details affect long-term durability and the inflatable tent’s lifecycle in family trips or rugged backpacking journeys.
That foundation informs setup speed and stability best practices, helping you choose a model that delivers reliable performance in real-world conditions. The right criteria streamline decisions and pave the way for efficient setup speed and stability best practices.
Setup speed and stability best practices
Inflatable tents streamline camping by replacing poles with air beams, delivering quick setup and predictable tension. When you pair rapid inflation with solid staking and wind-ready guylines, you get a robust inflatable shelter that’s easy to use on family trips, weekend escapes, or backpacking outings where weight and setup speed matter. Plan your campsite, follow the manufacturer’s tension sequence, and keep a few practical tools at hand to maximize performance in varying conditions.
How to set up an inflatable tent quickly
Prepare campsite layout and lay out components before inflating
Choose level, debris-free ground and clear a 2–3 meter radius around the footprint. Lay down a groundsheet or footprint to protect the floor, orient the doors away from prevailing winds, and place the pump and repair kit within easy reach. Pre-arrange air beams, connectors, guylines, stakes, and stakes bags so you can grab what you need without rooting through bags. A well-laid-out setup reduces time by 25–40% and minimizes the chance of misalignment for the best inflatable tent experience.
Inflate in stages following the manufacturer’s sequence for consistent tension
Follow the model’s recommended inflation order—usually main air beams first, then peripheral sections, finishing with corner and door seals. Inflate gradually, checking each section for even tension and avoiding hot spots. After each stage, test the tent’s stance by gently pressing corners; adjust as needed before moving to the next stage. This disciplined approach yields uniform fabric stress distribution and better waterproof performance across the inflatable shelter.
Pump management and air beam tensioning
Use a built-in or compatible pump to reach recommended pressure
Many air tents include a built-in pump or support a compatible external pump. Use the provided gauge to reach the manufacturer’s target pressure, commonly in the range of 6–9 psi (0.4–0.6 bar) depending on the model. For a waterproof inflatable tent with built-in air pump, monitor temperature during rapid inflation to avoid overheating the pump or seams, and pause if you notice any unusual resistance.
Avoid over-inflation to prevent material stress and leaks
Over-inflation strains seams, valves, and fabric, increasing the risk of leaks or blowouts. Stop as soon as beams feel firm and the structure holds shape without visible sag. If you detect stiffness or gasping sounds at seams, release a small amount and recheck. Real-world tip: always inflate in stages, then fine-tune with the pump to maintain a stable, durable form across all air beams.
Stability on different terrains
Position on level ground when possible and set stakes at appropriate angles
Aim for a flat site; slight slopes can be mitigated with a groundsheet and run-off planning. Stake corners at roughly a 45-degree angle to maximize pull without tearing fabric, and use longer stakes or reinforced anchors on rocky or compact soil. In uneven terrain, adjust peg depths to maintain a taught footprint and even tension around the inflatable shelter.
Use guylines and a groundsheet to improve wind resistance
Guylines dramatically improve stability in wind. Attach at each corner and midpoints, extending lines to secure anchors or deadmen in loose soil. A groundsheet adds waterproof protection and helps distribute wind load away from seams. In exposed conditions, add more guylines or ballast (sandbags, packs) to keep the blow up tent steady, ensuring comfort and safety for the family during windy nights.
inflatable tent FAQ

Inflatable tents simplify setup and deliver dependable shelter for family trips, offering fast pitching and strong stability. The answers below help you choose and use air tents with confidence.
What is the best inflatable tent for family camping?
For family use, prioritize 2–3 rooms, a roomy central living area, and two entry doors. Airbeam designs deliver solid structure without heavy poles, while taped seams and a durable floor boost weather resistance. A waterproof rating around 2000–3000 mm suits most conditions, and blackout bedrooms help with sleep. Ensure the size fits your family and gear.
Quick tips
- Consider a 6–8 person footprint for comfort and future gear needs.
- Look for two doors, a large living area, and taped seams.
How do I set up an inflatable tent quickly?
To set up quickly, lay the footprint, stake the corners, and connect the pump. Inflate the air beams first, then raise any vertical supports until stable. Attach the inner tent, add the rainfly, and tension the guy lines. Practice once at home to shave setup time on site.
Quick tips
- Practice inflating at home to reduce campsite delays.
- Use a pump with a gauge and avoid over-inflating.
Are inflatable tents waterproof and do they include an integrated air pump?
Most inflatable tents are waterproof when seams are sealed and fabrics meet a suitable hydrostatic head; budget models typically range 2000–3000 mm, with higher-end options exceeding 4000 mm. Not all include an integrated pump; some have built-in hand or electric pumps, while many require an external unit. Check specs to confirm.
Quick tips
- Verify waterproof rating, sealed seams, and the rainfly.
- If you need built-in pumping, filter models accordingly and pack a backup pump.
Conclusion and practical takeaways
Key takeaways for choosing the right inflatable tent
Assess capacity, weight, and price to find the best inflatable tent for family camping
Match the sleeping layout to your group and desired living space. For families, target 4–6 person models with a roomy inner area and a dedicated vestibule for gear. Use manufacturer capacity ratings as a guide, but supplement with real-world space estimates—comfortable setups often require a solid living zone plus gear storage. Weight matters for transport: lightweight air tents are easier to haul for car trips, while larger family setups with built-in pumps tend to be heavier. Expect a broad price range: entry-level options under budget-friendly, mid-range builds around a few hundred dollars, and premium designs that emphasize longevity, taped seams, and integrated pumping.
Compare air tent designs, valve systems, pump options, and portability
Understand how the air beams are arranged—multiple smaller beams can offer stable, redundancy-friendly support, while a single large beam can reduce setup complexity. Valve systems matter: look for easy, reliable one-way valves to speed inflation and quick deflation. Pump options directly affect setup time: built-in electric pumps speed up assembly; external pumps add flexibility when you’re away from power. Portability counts too: check packed size, weight, and whether the included bag makes movement between car and campsite easy.
Plan for durability and weather with waterproofing, seam construction, and vestibule design
Prioritize waterproofing and seam construction. Look for taped or welded seams and a robust groundsheet, plus a vestibule that sufficiently protects gear from rain. Check the fabric’s feel for abrasion resistance and consider a model with a footprint or groundsheet to extend life. A well-designed inflatable shelter should stand up to wind and light rain with stable stakes and guy lines.
Maintenance and care for longevity
Dry thoroughly after use and store with valves closed to prevent leaks
Air out the tent after use, dry all fabrics, and keep doors and vents open during drying. Deflate completely and close valves before packing to minimize the risk of slow leaks. Store in a cool, dry place away from direct sun to protect fabric and seals.
Regularly inspect seams, zippers, and floor protection
Check seams for any signs of wear or small gaps and reseal with manufacturer-approved products. Lubricate zippers periodically and inspect the floor for protection; replace worn segments and maintain a durable groundsheet or footprint to extend life.
Final recommendations for fast setups and stability
Affordable inflatable tent with easy setup as a core criterion
For quick, reliable camp readiness, pick models marketed for easy setup and fast inflation. A waterproof inflatable tent with built-in air pump often delivers the best balance of cost and convenience for family camping.
Prioritize reliable pumps and stable air beam systems for quick, durable setups
Choose airbeam tents with dependable pumps and multi-chamber beams to maintain shape even if one beam deflates. Ensure a solid warranty and carry a compact repair kit for on-site fixes, so setups stay fast and sturdy mile after mile.