

Table of Contents
1. Quick setup tent: Introduction
2. Core design principles for quick setup tents
3. Practical setup steps and troubleshooting
4. quick setup tent FAQ
5. Conclusion: Best practices for reliable fast pitching
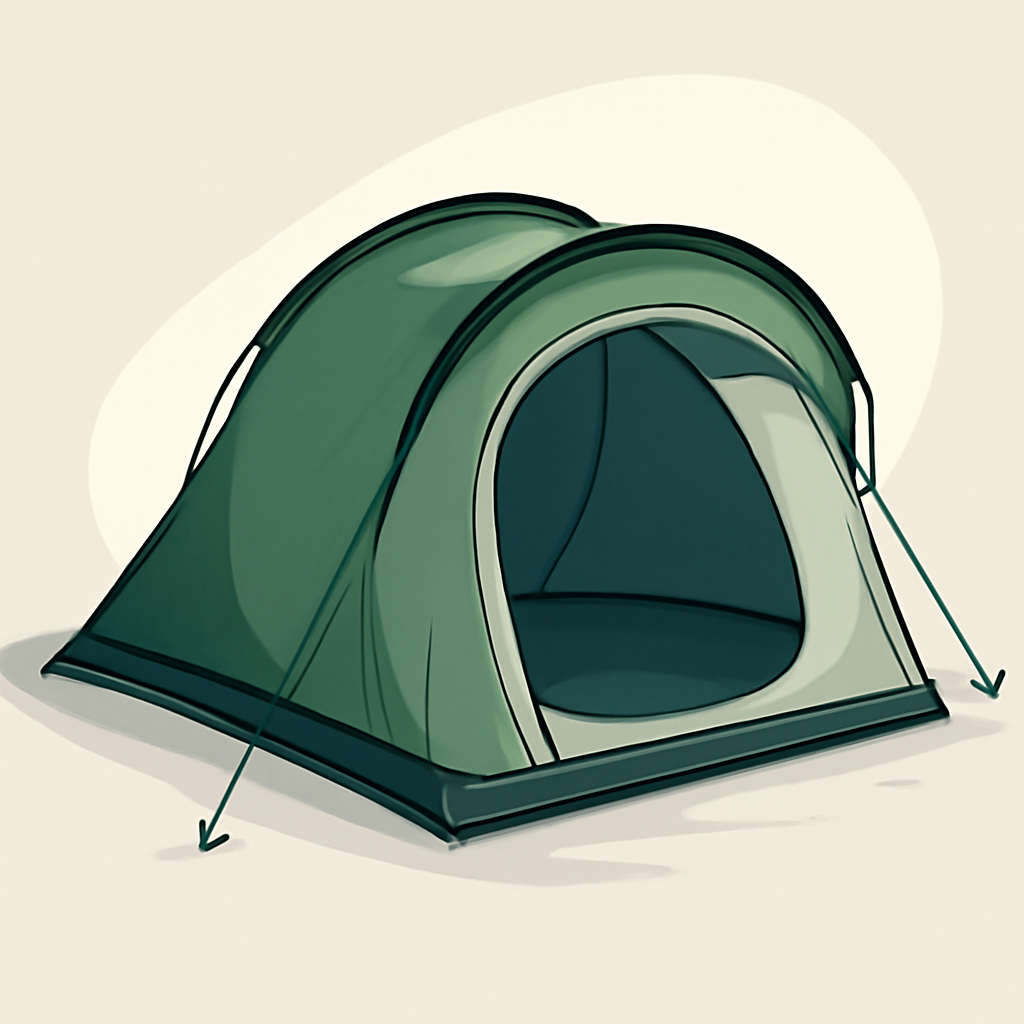
Quick setup tent: Introduction
quick setup tents shorten the path from car to campsite, letting you enjoy more time around the fire and less time wrestling with poles. A well-designed model uses features that streamline assembly and weather protection, from easy tent setup to instant pop up capabilities, helping you learn how to quickly set up a tent even after a long drive. portable camping tent setup should emphasize reliable components, lightweight frames, and intuitive cues that guide you to a pitch. The result is shelter that compounds comfort with efficiency, not complexity.
What qualifies as a quick setup tent
- #### Pre-attached poles, color-coded clips, and an integrated rainfly reduce steps to near-zero setup
- #### Claimed Times vs Real-world: instant pop ups can set up in under a minute; fast-pitch designs take only a few minutes
Benefits of fast pitching for camping
- #### Reduces fatigue after long travel or hikes and frees time for tasks
- #### Improves safety and comfort when weather shifts, shortening exposed setup time
quick setup tent for beginners guide
- #### Look for clear setup guides, in-store demos, and simple diagrams to learn fast
- #### Prioritize easy portability, light weight, and forgiving procedures for practice
These features guide buying signals, shaping quick setup tent choices. The core design principles balance speed, portability, and forgiving assembly to support confident pitching in changing weather.
Core design principles for quick setup tents

A quick setup tent hinges on smart assembly logic: fewer loose parts, intuitive alignment, and a framing system that goes up cleanly even in dim light or chilly wind. The goal is to shave minutes off the initial pitch while preserving stability, weatherproofing, and interior usability. Practically, that means prioritizing pre-attached pieces, integrated rain protection, and a streamlined hub-and-frame approach. This framework supports easy pitching for beginners and efficient setup for seasoned campers alike, making it easier to manage fast transitions from car camping to shelter.
Pre-attached poles and color-coded components
Fewer loose parts means less fumbling and faster assembly
Pre-attached poles reduce the number of pieces you handle at ground level. One-dip, one-stroke assembly reduces fumbling, especially when hands are cold or gloves are on. In field tests, tents with integrated pole sleeves and self-stowing sections cut setup time by 15–30% versus standard systems.
Color-coding speeds alignment and reduces mistakes during setup
Color-coded hubs, poles, sleeves, and clips guide you to the correct pairing commands without constant referencing. For example, red corners, blue uprights, and green clips correlate with a single diagram, enabling a quick, confident first-time pitch. For beginners, color cues translate to fewer misalignments and a more consistent result in windy or low-light conditions.
Integrated rainfly and tensioning aids
One-step rainfly deployment minimizes steps to seal and protect
A rainfly that attaches in one motion or folds into a single unit reduces the number of steps required to seal out moisture. One-step deployment minimizes snagging on zippers or poles, helping you achieve a weatherproof seal faster and with less cussing at 6 p.m. after a long day.
Built-in guy lines and tension straps simplify on-site setup in varying conditions
Integrated tensioning systems—adjustable guy lines, pre-routed stakes, and elasticized straps—let you dial in tension quickly. On a windy night, you can stabilize the fly and create a taut shelter without crawling on hands and knees; the result is a steadier vestibule and reduced risk of rain ingress.
Hub systems and lightweight framing
Aluminum or advanced composite hubs resist wind while staying simple to assemble
Hubs that snap or click into place minimize fiddling and torque on joints. Lightweight alloys or composites resist deformation in gusts, keeping the shelter upright with minimal effort. A clean hub design also reduces the number of required tools and torqueing steps.
Durable vestibules and stake-out points maintain stability for quick setup
Sturdy vestibules provide quick-access storage while preserving footprint stability. Well-positioned stake-out points and reinforced guy-line anchors enable rapid securing in uneven terrain or loose soil, so you can finish pitching fast and move to interior setup without redoing lines.
With these principles in mind, you’ll experience noticeably faster setup times, more reliable protection, and a smoother transition from car to campsite. Practical setup steps and troubleshooting await, helping you translate design into dependable on-site performance.
Practical setup steps and troubleshooting
A quick setup tent thrives on a disciplined sequence: smart placement, fast anchoring, decisive raising, wind-ready tensioning, and tidy pack-down. The approach works across quick setup tents, including instant pop up tent designs and portable camping tents, helping you shave setup time without sacrificing stability. Use these steps to master fast pitching on a windy night and to keep your gear ready for repeat use.
Initial placement, staking, and anchoring for speed
Plan orientation before arrival to minimize shuffling gear
Before you arrive, map how the tent will sit relative to sun, shade, and prevailing breeze. On arrival, you can unroll and align quickly, which reduces back-and-forth reorganization. Having a clear layout also helps you position a vestibule for quick access to gear without stepping on the footprint.
Use a two-stake method for quick, stable anchoring
For a fast, reliable anchor, secure the front two corners first, driving stakes outward at a 45-degree angle. This creates a stable base you can trust while you work the rest of the setup. Add rear corners and any necessary guylines once the structure is upright. If ground is soft, switch to longer stakes or add ballast (sandbags, packs) to prevent pull-out, maintaining the same quick-pitch discipline.
Raising the tent and wind-ready tensioning
Lift and secure promptly
With a hub or pole-in-clip system, stand the frame in one decisive motion and seat the poles quickly. Once the structure is upright, pull the fabric corners into place and confirm all clips or connections engage cleanly. A prompt raise reduces the chance of fabric snagging and helps you find tethers that need adjustment.
Engage guy lines early to stabilize shape
Attach all guy lines early, starting from the storm-facing corners and moving to midpoints and rear lines. Gentle, progressive tension locks the canopy shape and resists flutter. In light wind, you can keep lines moderate; in gusts, increase tension gradually as the tent accepts the wind without distorting.
Avoid over-tensioning fabric in windy conditions to prevent damage
In windy conditions, avoid maxing out tension on every edge. Excessive tension can stress seams and stretch fabric. Allow slight give to accommodate gusts, then recheck tensions after a calm period. This balanced approach preserves fabric longevity while keeping the tent solid.
Post-pitch checks and quick pack-down
Verify zippers operate smoothly and fabric is dry
Test zippers from both ends while the ground is still accessible. If moisture or condensation forms, unzip vents to dry and wipe lids. Ensure fabric is dry to prevent mildew and to maintain performance for the next setup.
Pack in a way that preserves structure for easy transport and repeat use
Fold and orient the canopy along the same lines used during setup, then store poles in their dedicated sleeve or bag. Clip system pieces and guylines neatly, place stakes in a compact sack, and keep the footprint flat. Proper packing preserves the tent’s alignment, easing the next deployment and sustaining a truly quick setup tent experience.
quick setup tent FAQ
A quick setup tent speeds the transition from car to campsite, improving portable camping tent setup and reducing exposure to wind and rain. By choosing fast pitching designs and mastering a few proven steps, you can cut setup time without sacrificing stability.
What is the quickest tent to set up?
Instant pop up tents with a central hub or pre-attached poles are typically the quickest to deploy. A compact 2-person model can go from bag to stand in about 30 seconds; larger family tents may need a few minutes. After standing, finish by staking the corners and tightening guylines for wind resistance.
Is a pop-up tent actually easier for beginners?
For most beginners, yes. The elimination of pole assembly reduces confusion and time. Still, wind, uneven ground, and proper staking matter. Practice at home, check the ground cover, and learn how to fold it back for packing to maintain quick, reliable setup under real conditions.
How can I pitch a tent quickly on a windy night?
Prioritize shelter and speed: choose a low, protected spot, lay the footprint, and stake a corner to hold the place. Have a partner help raise the tent, then stake the remaining corners and tighten all guylines from the windward side. If using a pop-up, deploy, anchor, and add lines early to prevent late kiting.
Best practices for reliable fast pitching

Achieving reliable fast pitching hinges on selecting the right design and building a repeatable setup routine. With the right quick setup tent, you can cut setup times dramatically without compromising stability. Use these practices to sharpen accuracy in the field, whether you’re chasing an instant pop up tent experience or a sturdy portable camping tent setup.
Key takeaways for beginners
Practice regularly in calm conditions to build muscle memory
Schedule two 20–30 minute sessions per week in a sheltered, wind-free space. Lay out the tent, stake corners, raise the frame, install the fly, and tuck guy lines. Track your time in a simple log and aim to shave 10–20 seconds per session over a month. Repetition builds reflexes so the act of pitching becomes automatic, letting you focus on site selection and shelter maintenance rather than assembly.
Keep gear organized, with a dedicated bag and routine for quick setups
Use a dedicated quick-setup bag with clearly labeled compartments for poles, stakes, rainfly, and the carry bag. Color-code straps and keep a short pre-pitch checklist inside the lid. Develop a 5– to 10-minute routine: grab the right pieces, lay out the footprint, and verify wind conditions. When you’re under pressure, organization becomes the difference between a smooth setup and fumbling delays.
Buying considerations for quick setup tents
Prioritize true popup or hub-frame systems
True popup designs and hub-frame tents reduce assembly steps and misalignment. They typically deploy in under a minute in calm weather and stay stable with minimal fidgeting. Test at home to confirm it matches your camping style—quick pitching is only as good as the confidence you have in the initial placement and tensioning.
One-piece rainfly and compact packed size
A single-piece rainfly minimizes attachment steps and potential misalignment. Look for a compact packed size that fits your car or backpack without adding bulk to the carry bag. For two-person setups, target a packed length around 12–18 inches and a weight that remains manageable for solo trips.
Check warranty coverage and availability of replacement parts
Choose models with solid warranties (2–3 years or more) and easy access to replacement parts like poles, clips, or grommets. Verify online storefronts or local service centers near your typical campsites. The availability of affordable replacements keeps you on the move, not stranded by a snapped clip.
Maintenance to preserve easy pitching over time
Dry thoroughly after use and store in a breathable bag
Always air out tents completely before storage to prevent mildew and odor. Dry fabrics prevent long-term stiffness and cracking, while a breathable bag keeps moisture from lingering. Avoid compressing the fabric too tightly; loose storage helps preserve flexibility.
Inspect poles, clips, and fabric for wear and replace parts as needed
After each trip, inspect for bent poles, cracked hubs, damaged clips, and fabric abrasions. Replace worn parts promptly and keep a small spare kit with core components. Regular checks reduce surprises during a windier night and help maintain the quick setup tent’s performance over time.